How to Manage Your Hosting Portal Invoices
To manage your invoices, you will need to go to the billing section of our hosting portal. Below are the instructions on how to complete different tasks in the billing section of our hosting portal.
View Your Invoices
To view your invoices, both paid and unpaid, follow the steps below.
- Log into your Hosting Portal
- Go to Billing > My Invoices (Or click on the Invoices Tile on the Main Page)
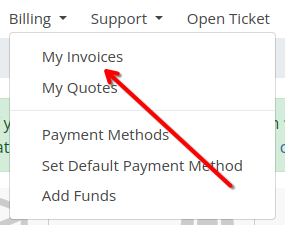
A screenshot of the Hosting Portal menu with the billing sub-menu extended. Menu items include ‘My Invoices, My Quotes, Payment Methods, Set Default Payment Method, and Add Funds’. There is a red arrow pointing to the ‘My Invoices’ link.
Make a Payment on An Invoice
To make a payment on a single invoice, follow the steps below.
- From the ‘My Invoices’ screen, click on the invoice that you want to make a payment on:

A screenshot of an invoice listing in the ‘My Invoices’ section of the Falls Tech Group hosting portal. There is a red arrow pointing to the Invoice Number as a reference on where to click. - You will be brought to a digitally rendered version of your invoice, with all of the line items, and remittance information included.
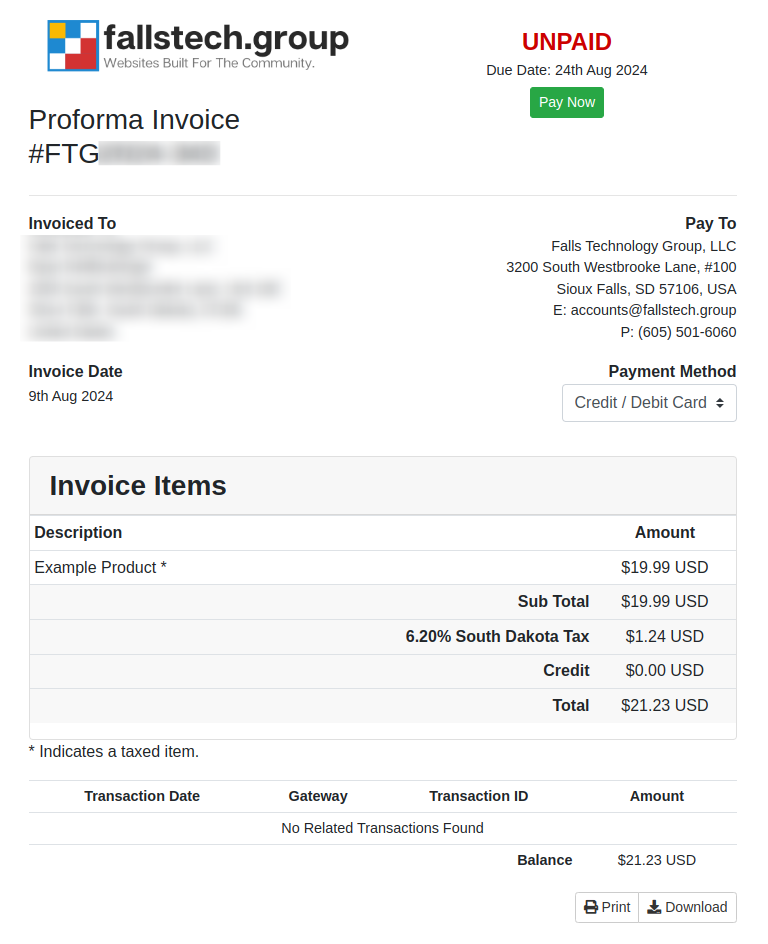
A screenshot of an invoice in the Falls Tech Group Hosting Portal. - To make a payment, click on the Pay Now button.
- On the payment screen, select your payment method,
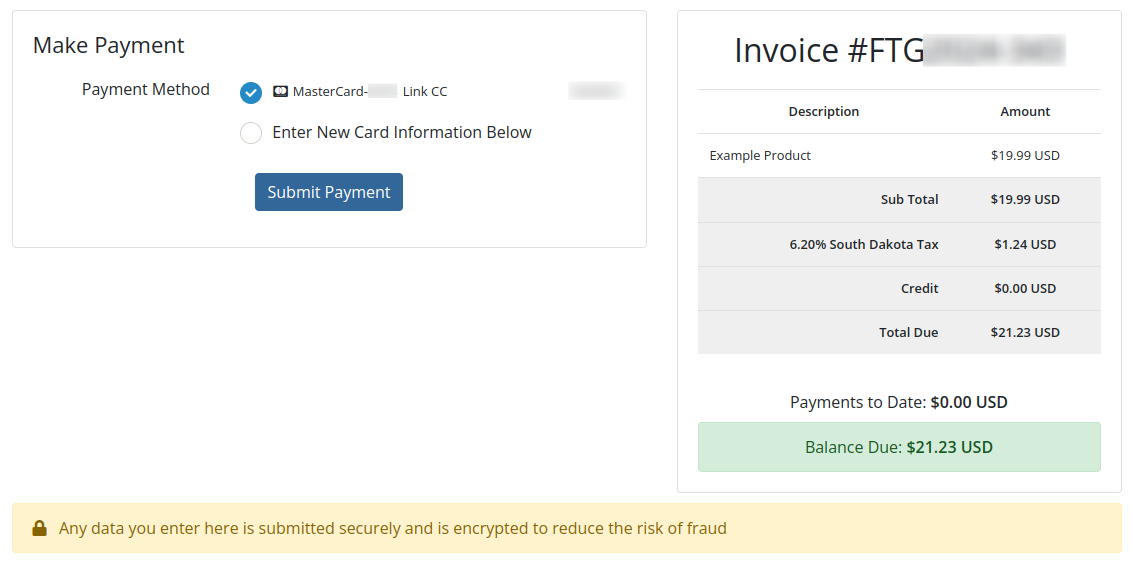
A screenshot of the payment screen in the Falls Tech Group Hosting Portal. The screen includes the ability to select an existing payment method, enter a new method, and submit the payment. - Once you have verified all of your information is correct, click Submit Payment.
- You will receive a confirmation in your email inbox shortly with your payment details.
Mass Pay Multiple Invoices at Once
If you want to pay multiple invoices at once, you can do so by submitting a Mass Payment. To do so, follow the instructions below.
- Log into your Hosting Portal
- Go to Billing > Mass Payment
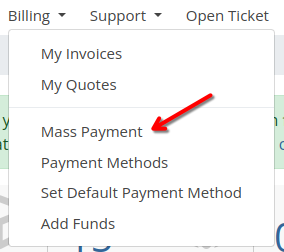 A screenshot of the Hosting Portal menu with the billing sub-menu extended. Menu items include ‘My Invoices, My Quotes, Payment Methods, Set Default Payment Method, and Add Funds’. There is a red arrow pointing to the ‘Mass Payment’ link.
 - Review the contents of the Mass Payment. This will include all individual outstanding invoices, as well as their line items.
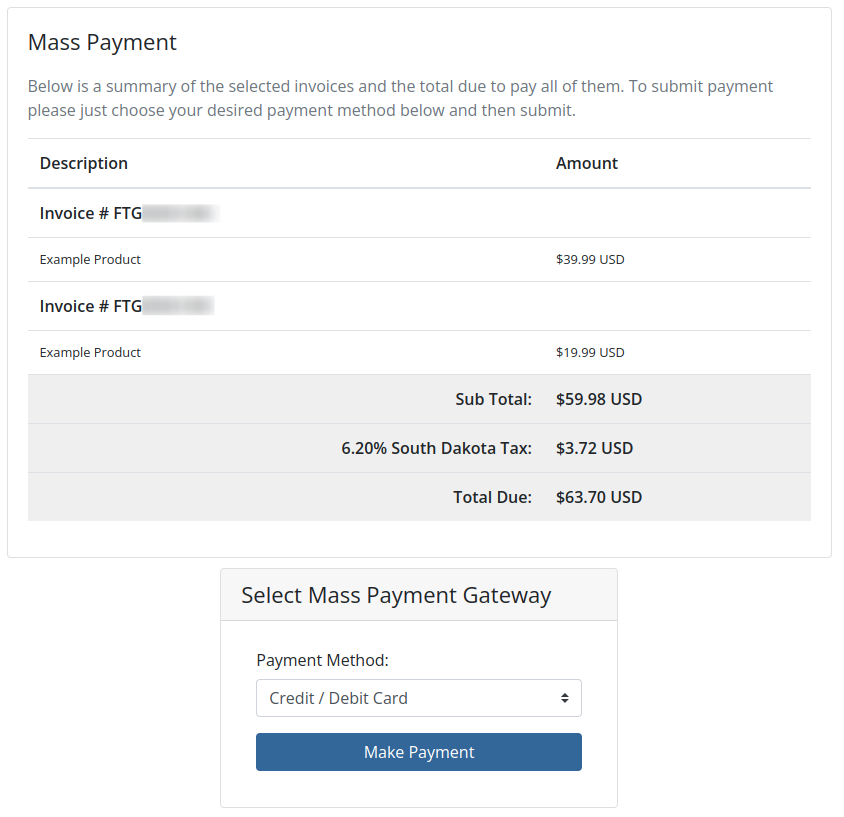
A screenshot of the Mass Payment screen in the Falls Tech Group hosting portal. The section includes a list of all unpaid invoices on the account and their line items, with total values at the bottom, and a payment button. Note: If you only have one invoice outstanding, you will be redirected to that invoice instead to make your payment.
- Upon clicking the Make Payment button, the system will generate a ‘Mass Payment’ invoice for your account, which you can then submit a payment against. Once this invoice is clear, the system will automatically mark the included invoices and the mass payment invoice as paid.
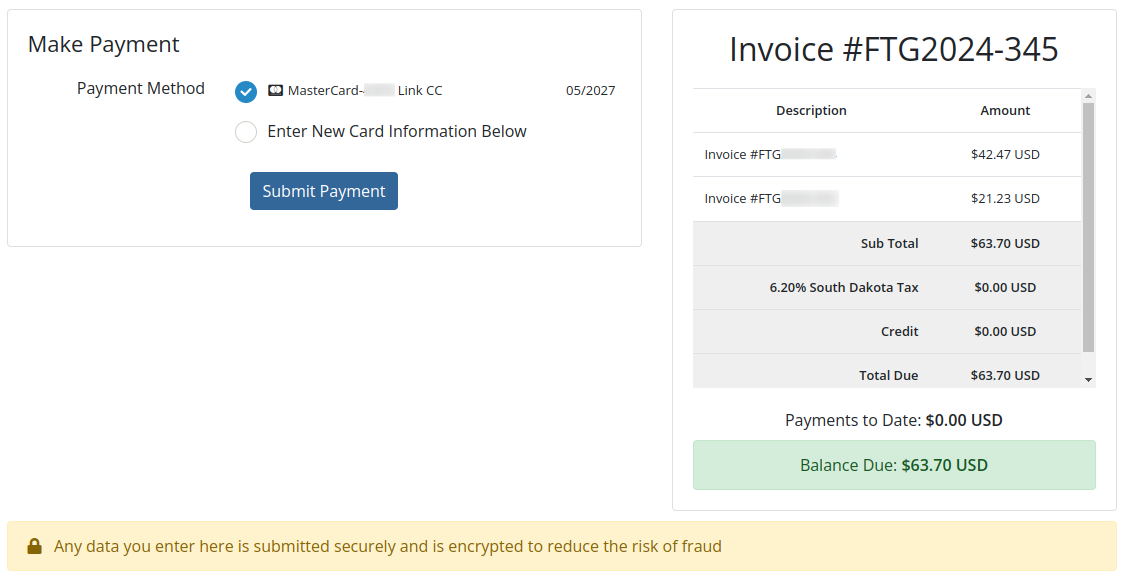
A screenshot of the mass payment screen in the Falls Tech Group Hosting Portal. The screen includes the ability to select an existing payment method, enter a new method, and submit the payment. - Once you have verified all of your information is correct, click Submit Payment.
- You will receive a confirmation in your email inbox shortly with your payment details.
Article Overview
