Brand Your Pre-Built Website Kit
WORK IN PROGRESS – ARTICLE IN DEVELOPMENT
This guide is is currently in development, and the current version may not reflect its final form. The steps and instructions reflected in this guide are accurate to the best of our knowledge but may be subject to change as final adjustments and audits are made to this article.
Branding is an important step of the website design process. This guide will walk you through how to complete the different branding steps for your theme kit to allow you to adjust the template to fit your business’s branding guidelines.
Change Site Logo & Favicon
To update the logo on your site globally, you can change the site logo file by following these steps.
- Go to Elementor > Home

A screenshot of the Elementor menu in the WordPress admin area with the ‘Home’ sub-menu item highlighted. - Click Site Settings (Customize)

A screenshot of the ‘Site Settings’ button on the Elementor Home page in the WordPress admin area. - Click Site Identity

A screenshot of the Site Identity site settings buttons in the Elementor Page Builder. - Find the Site Logo & Favicon fields, and click on the logo to select a different file.
- Click Save Changes
Adjust Elementor Global Colors
You will need to update the Global Colors to ensure that the coloring across the site reflects your brand properly.
- Go to Elementor > Home

A screenshot of the Elementor menu in the WordPress admin area with the ‘Home’ sub-menu item highlighted. - Click Site Settings (Customize)

A screenshot of the ‘Site Settings’ button on the Elementor Home page in the WordPress admin area. - Click Global Colors

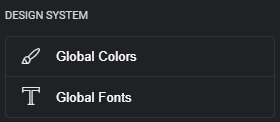
A screenshot of the Global Colors and Global Fonts site settings buttons in the Elementor Page Builder.
Here, you will be presented with a style guide preview page, with all of your options on the left-hand side. Below, we’ve listed the main colors used in our sites:
- Style Main Color
The main brand color that you want to showcase on your website. This will be used for things like buttons and highlights. - Style Main Accent
The secondary brand color that you want to showcase on your website. We recommend selecting something either complimentary, or neutral - Style Main Light
This is the light color that we use for light-background areas of the website. Typically these are a light grey, white, or beige, or even a pastel variation of the brand color. - Style Main Dark
This is the dark color that we use for dark-background areas of the website. Typically these are dark grey, black, or brown, or even a highly darkened/saturated version of the brand color. - Style White
Provides a global white variable that can be adjusted. - Style Off-White
Provides a global off-white variable that can be adjusted. - Style Light Grey
Provides a global light grey variable that can be adjusted. - Style Grey
Provides a grey variable that can be adjusted. - Style Black
Provides a black variable that can be adjusted. Usually set to black or off-black.
DIY TIP: If you need assistance figuring out good color matches, you can use a tool like coolors.co to enter your brand color to generate a palette to compliment it.
You can adjust these however you see fit, and they preview them on your site by turning off the Style Guide Preview

Adjust Elementor Global Fonts
Design Note: There are a few special tweaks installed in the Elementor Page builder for your kit templates that correct for inconsistencies in font spacing that naturally occur between browsers. If you continue, please keep in mind that you may notice off-setting or strange spacing of elements. You may need to make some adjustments to fix some spacing issues depending on the font you select.
At the moment, we do not have a guide written for this. You are welcome to follow the guide below and proceed at your own risk. We will be revisiting this section to expand it at a later time.
Upload Website Content
Now that your colors and fonts are adjusted, now is a good time to drop in your copy, images, and content into the website. This would include things like your page content, as well as your blog posts, categories, and tags for how you want to organize your blog.
